Monday, February 21, 2011

Bib Tie Necklace

 My friend, Lauren, saw ties similar to these...a really long time ago...and asked me to give it a whirl!  Over Christmas break Lauren gave me two of her Dad's old ties, but I was incredibly intimidated at having to hand sew a large portion of it, so I just kept putting it off.  When I finally gave it a shot I realized it wasn't so bad!  If anything it's really just making sure I put the pleats in the right spot so that it lay's nicely.  I picked up a few more ties this weekend to make sure I know what I'm doing...so hopefully I can make a few more, and really get how to make them before I totally move on to another project!  One of the ties I picked up is MAROON (VT Hokies?).  I'll have to pick up a cute Tech pin at the bookstore to make it a game day necklace.  Should be fun!   
I made a pin out of a 50 pence coin from a recent trip to the UK.
This is one of the 10 cent zippers from the Y Thrift Center!

Sunday, February 13, 2011

m&m Shirts

Renee, Debbie, Karly, Elizabeth, Kayla
The school I teach at does an Awareness Week each year.  This year funds were raised for St. Judes Children's Hospital, which is pretty cool.  During Awareness Week we have spirit days.  Like homecoming or prom week it gives a fun excuse to dress up and be silly.  Spirit days can be nutty, but hey, who doesn't like a little bit of fun?  One of the days was "Character Day."  I was all for making CareBear shirts...but the rest of the gang didn't go for that!  I was thinking we could get a ton of felt and go to town making the CareBear stomachs...plus we could do the "CareBear Stare" to students.  Except my idea of the "stare" is more like the stink eye, so that might not have worked so well!
 We also considered buying the Sesame Street shirts, but at 20 bucks a pop we had to rule that one out!
(We wouldn't have had our names on them...this picture just shows the different ones available!)


In the end we decided to be m&m's and we were able to make our own shirts!  We picked up different colored t-shirts at Michael's ($3.99 regularly...but I had a 45% off coupon so it was only $2.30 with tax!), along with Tulip Fabric Spray Paint.

Then we made an "m" stencil using the school library's Cricut cutter!  We used freezer paper for the stencil, which can be ironed onto fabric.  Then we just had to spray on our paint, peel off the stencil, and wait for the paint to dry!  You can also use regular fabric paint with a roller paint brush, however the spray paint was perfect for our shirts as it looked most like an actual m&m candy!


For a more thorough tutorial, with step by step pictures, see Tangled & True's post on personalized shirts.  This is how we made our shirts, with a few tweeks!

Tuesday, February 8, 2011

Corn Chowder

Here's the thing...I haven't been the best cook lately.  I've made a lot of really simple, super cheap, and downright lazy dinners.  I decided it was time to try something new (and to actually cook...if I'm being honest), and a soup sounded like just the thing!  I flipped through a few of my cookbooks and found this recipe.  I usually try to find recipes that follow these three guidelines:
    1. It should be simple. 
    2. Most of the ingredients should already be in the house. 
    3. Making it shouldn't consume my entire evening. 
The Taste of Home Cookbook gets it right most of the time! My mother-in-law gave me this cookbook for Christmas a few years ago and it really has some great recipes!


Ingredients: 
    1 large onion, chopped
    1/2 cup butter
    2-1/2 cups water
    2 cans (14-3/4 ounces each) cream-style corn
    4 medium potatoes, peeled and cut into 1/2-inch cubes
    2 cups milk
    1-1/2 teaspoons salt
    3/4 teaspoon pepper
    Minced fresh parsley (or dried!)


1. In a DUTCH oven, saute onion in butter until tender. Add the water, corn and potatoes; bring to a boil. Reduce heat; cover and simmer for 16-20 minutes until potatoes are tender. Reduce heat to low.

2. Stir in the milk, salt and pepper. Cook for 5-10 minutes or until heated through, stirring occasionally. Sprinkle with parsley.

Makes about 2 quarts.

Editor's Note: You may substitue 2-1/2 cups chicken broth for the water. Omit salt.

I didn't notice the "Editor's Note" until typing this up...but I thought about adding broth as I was cooking because I freeze my chicken broth when I cook up chicken! Kinda funny! I also think adding the broth and some chicken would make it a lot more like my favorite college town resturant's Chicken Corn Chowder.  To make it more like 8th Street Grill's chowder I would probably add a little more corn as well.

When I made it tonight I used 6 small red skin potatoes, with the skins. I think next time I'll use OreIda frozen, cubed potatoes and just wait a few minutes after adding the corn and water/chicken broth before tossing in the potatoes. I would probably toss them in frozen.  I think this would make this recipe even easier as you wouldn't have to peel potatoes and the small size is perfect for soup!

It was really good as was, but think you could have some fun switching it up! Definitely going to try making it with homemade chicken broth next time!  Which will probably be next week!

It's sooo pretty!

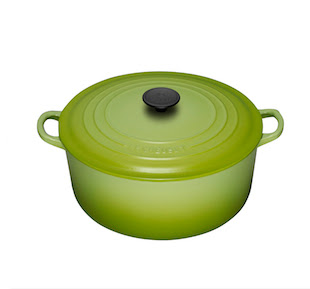
 Can I just add as a side note that I've always wanted a Le Creuset French Oven.  I've never used one...but I know they are quality.  And I LOVE the colors!  They are so much fun!  Right now, I would totally go for the kiwi color...but dijon and carribean would be right up there too!  Sometimes TJMaxx/Marshall's/Ross will carry different Le Creuset pieces, but they're still expensive!  Someday...right?

Wednesday, February 2, 2011

Exponential Flower Power

Ok, so these flowers aren't really being made at an exponential rate...but they do seem to multiply AND a student asked me to explain something involving exponents today...so exponents are on my mind!  Flowers are such a fun thing to create!  They're quick, easy, and are usually pretty cheap to make!  This is just a sampling of my "flower stash" right now!

1/6: Yo-yo's of course!  I want to make some cute little bobbies with these at some point, but I need to find a good button for the middle.  Perhaps when the "funds-low" virus passes???

2/8: Felted wool.  I used scraps from my sweater mittens and cut out each individual petal.  I glued them down on a felt circle and gave them a fancy pearl center.

3. Felt and Embroidery Thread.  This is one I made with my little cousin over Christmas break.  She had a similar headband in different colors, so this one is a copy cat.  My cousin has hers on a headband...but I wanted to make a few more before I add it to a headband...and I need to get some more headbands!

4. More Felted Wool.  I wish I had bookmarked the tutorial for this one!  It was so simple!  It's just two strips of fabric (sweaters) that get folded hot dog style and then the "petal" are cut by cutting on the fold until there is only 1/4 inch left.  Then you need to roll it up and sew/hot glue it all together.  Not the best explanation...but I hope you get the gist!  I think this little pretty needs a button, or something sparkly in the center...not sure exactly...

5. Vintage Zipper.  This is one of the zippers I picked up at the thrift store for 10 cents!  I think it was either 17 or 20 inches.  I used the hot glue gun to make this one.

7. Yarn.  I used an Apple Blossom pattern I found at Crochet Pattern Central.  Somewhere in blogland I saw a really cute picture frame with crocheted flowers glued to the glass.  I don't think I saved the picture...or if I did I can't remember what it was saved as.  Bummer.  Anyway, I want to use the frame above, but need to try out some different crocheted flowers.  The ones I originally made are too big...but this one might still make the cut!

~Other flowers~
This is a crocheted flower pin I used as a bow.
 I haven't made this pretty DAHLIA garland yet...but Dahlia's are my very favorite flower, so I imagine I will have to make it at some point!  Based on the tutorial Me Oh MY! posted I think these would be fairly simple to make!
Dahlia Garland from the Me Oh My! blog.